For now, we have some libraries that can help us to generate the react native modules. On the react native home page, they suggest using create-react-native-library library to setup a native module. The document link: https://reactnative.dev/docs/native-modules-setup .
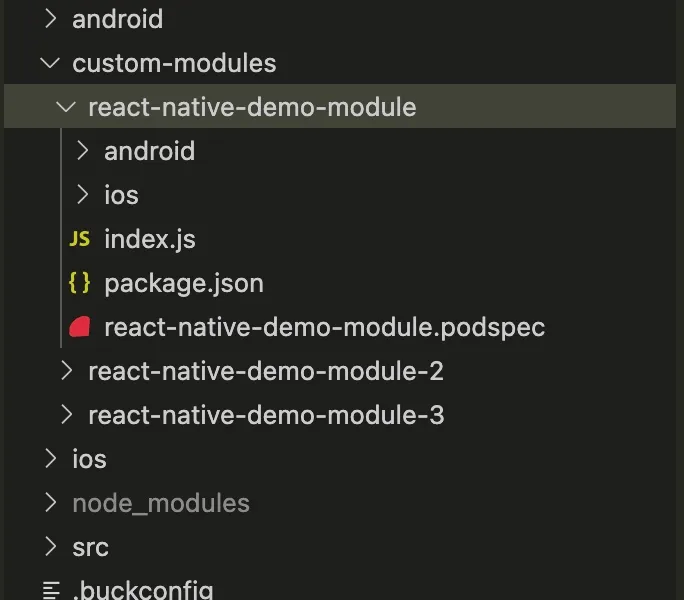
In this blog, I’m going to show you how to create an ios module without any library. In your root project, you need to create a new folder to develop the custom modules: custom-modules/react-native-demo-module (react-native-demo-module is your module name).
Inside a basic native module, we will have some main parts:
- ios folder
- android folder
- index.js
- package.json
- react-native-demo-module.podspec (react-native-demo-module is your module name)

1. Create iOS library
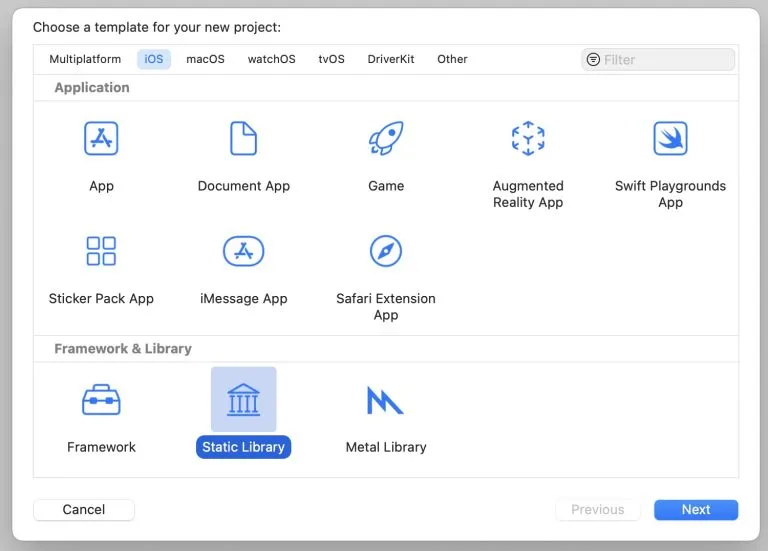
Open your Xcode > Create a new Xcode project. Choose iOS > Static Library.

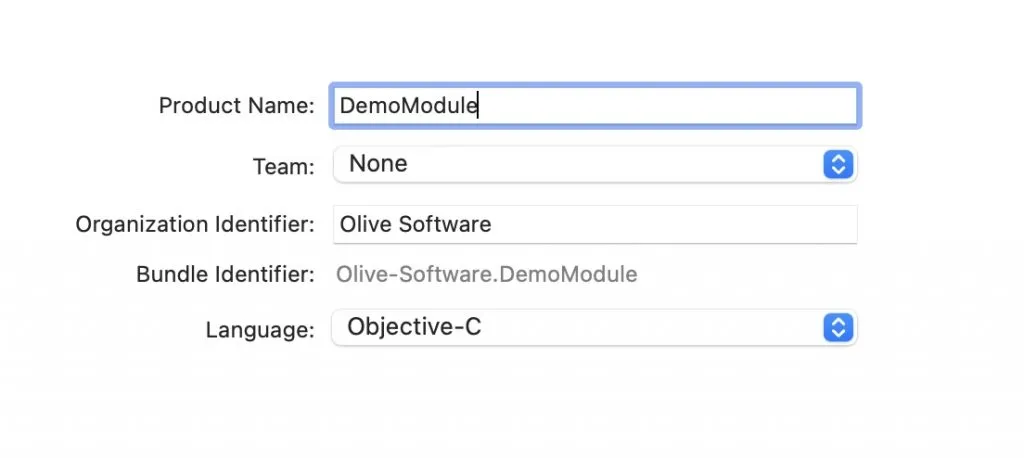
Fill your module name. Eg. DemoModule > Objective-C

Save in the ios folder inside your custom module. After that, Xcode will generate the default files for a static libary. We just need to handle the logic inside .m & .h files. In this blog, we’re trying to write the basic logic to get the current location.
    // DemoModule.h
#import <React/RCTBridgeModule.h>
#import <CoreLocation/CoreLocation.h>

@interface DemoModule : NSObject <RCTBridgeModule>

@end
Inside DemoModule.m file, using RCT_EXPORT_MODULE to export a native module, RCT_REMAP_METHOD to define a function of the module. We have two ways (emit events & return a promise) to pass the data from a native module to the js code. We have been using promise way in this sample code.
In this sample, we will return the coordinate data by resolve & return an exception by reject. The returned value is an array that contains latitude & longitude as the strings.
    // DemoModule.m
#import "DemoModule.h"

@implementation DemoModule
{
    CLLocationManager *locationManager;
    CLLocation *currentLocation;
}

RCT_EXPORT_MODULE()

RCT_REMAP_METHOD(getCurrentLocation, resolver:(RCTPromiseResolveBlock)resolve rejecter:(RCTPromiseRejectBlock)reject)
{
    @try {
        CLLocationManager *locationManager = [[CLLocationManager alloc] init];
        locationManager.delegate = self;
        locationManager.distanceFilter = kCLDistanceFilterNone;
        locationManager.desiredAccuracy = kCLLocationAccuracyBest;
        [locationManager requestWhenInUseAuthorization];
        [locationManager startUpdatingLocation];

        // Get coordinate data
        CLLocation *location = [locationManager location];
        CLLocationCoordinate2D coordinate = [location coordinate];

        // Get latitude, longitude by string
        NSString *latitude = [NSString stringWithFormat:@"%f", coordinate.latitude];
        NSString *longitude = [NSString stringWithFormat:@"%f", coordinate.longitude];

        // Return an array value of latitude, longitude to JS code
        NSArray *result = @[latitude, longitude];
        resolve(result);
    } @catch (NSException *exception) {
        NSString *error = @"Can not get the current location";
        reject(@"Error", @"Error description", error);
    }
}

- (void)locationManager:(CLLocationManager *)manager didUpdateLocations:(NSArray *)locations
{
    currentLocation = [locations lastObject];
    [locationManager stopUpdatingLocation];
}

@end
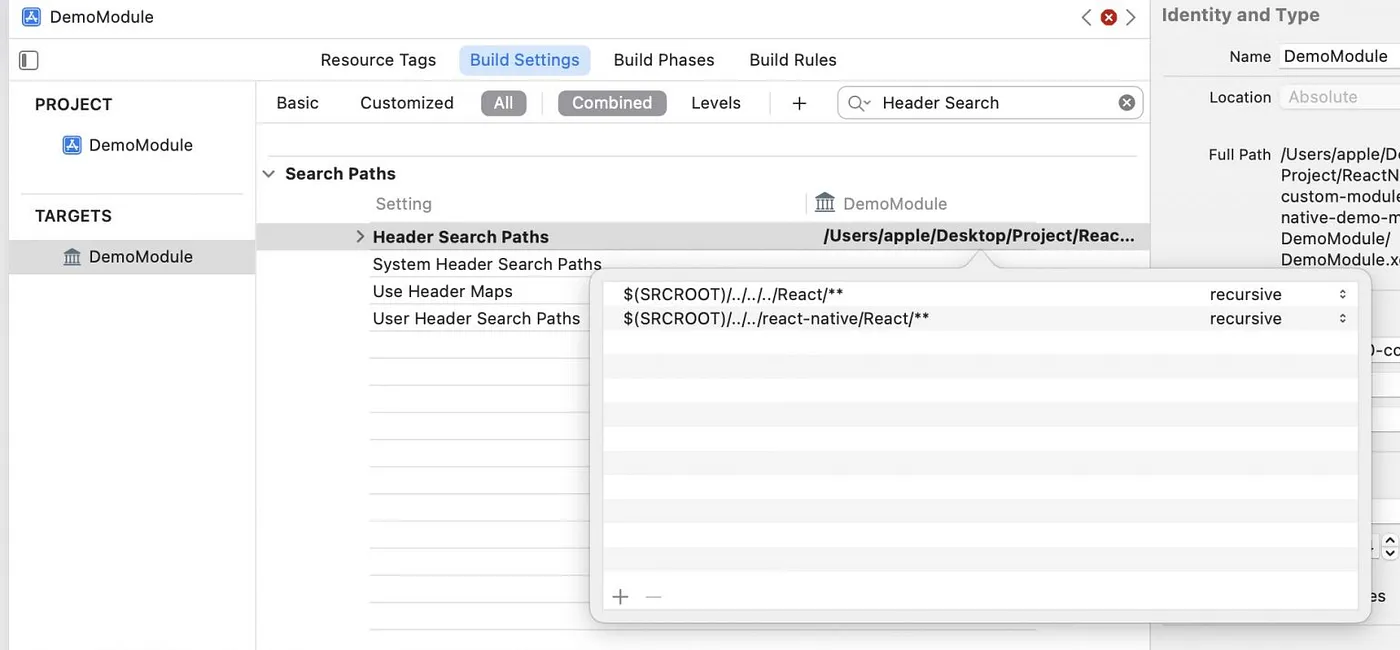
The next step, open the DemoModule.xcodeproj by your Xcode and config somethings manually. Go to Build Settings > Header Search Paths. Add two rows:
- $(SRCROOT)/../../../React/**
- $(SRCROOT)/../../react-native/React/**

2. Create package.json file
We must define the package.json file with some necessary fields.
    {
  "name": "react-native-demo-module",
  "version": "1.0.0",
  "description": "React Native Demo Module",
  "main": "index.js",
  "scripts": {
    "test": "echo \"Error: no test specified\" && exit 1"
  },
  "homepage": "https://github.com/oliveteam-developers/react-native-demo-module",
  "author": "https://github.com/oliveteam-developers",
  "license": "ISC"
}
3. Create index.js file
index.js file defines the methods that will be called from your logic code & handle the responses from your native module. In order to access to your custom module, using NativeModule package from react native core.
    // index.js
import { NativeModules } from 'react-native';

const DemoModule = NativeModules.DemoModule;

export function getCurrentLocation() {
  return DemoModule.getCurrentLocation();
}
4. Create podspec file
In order to install your custom module for ios, we must define the react-native-demo-module.podspec file.
    require "json"

package = JSON.parse(File.read(File.join(__dir__, "package.json")))

Pod::Spec.new do |s|
  s.name         = "react-native-demo-module"
  s.version      = package["version"]
  s.summary      = package["description"]
  s.homepage     = package["homepage"]
  s.license      = package["license"]
  s.authors      = package["author"]

  s.platforms    = { :ios => "10.0" }
  s.source       = { :git => "https://github.com/oliveteam-developers/react-native-demo-module.git", :tag => "#{s.version}" }

  s.source_files = "ios/**/*.{h,m,mm}"

  s.dependency "React-Core"
end
Your custom module is ready for using. The next step, we’re going to config the custom module path in the Podfile. In your root project, go to ios > Podfile. You must add this row to your Podfile
pod 'react-native-demo-module', :path => '../custom-modules/react-native-demo-module'
After that, run pod install command in your ios folder to install your custom module. Open your react native project by Xcode and add two new permissions in Info.plist

5. Using the custom module in the logic code
Because your custom module has not been installed from npm command, so you cannot import the methods from your module by a normal way. In order to use your custom module, we have to define it in the tsconfig.json file. Add some lines inside compilerOptions.
    "paths": {
      "react-native-demo-module": ["./custom-modules/react-native-demo-module/index"]
 }
    // Your logic code
import React, { useState } from 'react';
import { View } from 'react-native';
import { getCurrentLocation } from 'react-native-demo-module';
import styles from './styles';

// Components
import TextView from '../../components/TextView';
import ButtonView from '../../components/ButtonView';

const CustomModule = () => {
  const [coordinate, setCoordinate] = useState({ lat: 0, long: 0 });

  const handleCurrentLocation = async () => {
    try {
      const res = await getCurrentLocation();
      setCoordinate({
        lat: parseFloat(res[0]),
        long: parseFloat(res[1]),
      });
    } catch (e) {
      console.log(e);
    }
  };

  return (
    <View style={styles.container}>
      <View style={styles.valueSection}>
        <TextView text={`Latitude: ${coordinate.lat}, Longitude: ${coordinate.long}`} />
      </View>

      <ButtonView
        text={'Detect location'}
        onPress={handleCurrentLocation}
      />
    </View>
  );
};

export default CustomModule;

In order to understand how to create the android module, please follow this blog How to create a React Native Android module.
Sample code at here: https://github.com/duongduckien/react-native-sample
