1. Setup project
First of all, we must setup an empty wordpress project. Download the latest wordpress version at https://wordpress.org/download/ Depends on your OS, you can setup wordpress with any web server you want (Apache, Nginx) In this blog, we’ve been using macos & nginx web server. Create a new database for wordpress project:
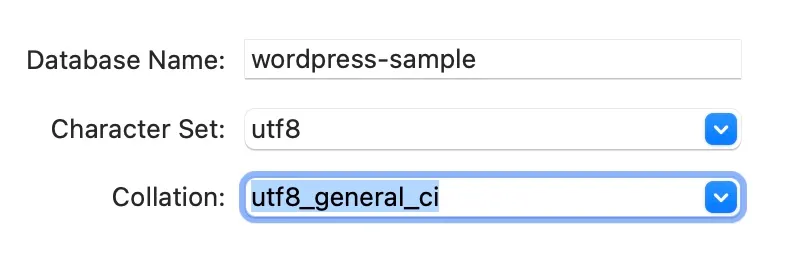
Go to hosts file at /etc/hosts and add a new local domain for this wordpress project 127.0.0.1 wordpress-sample.local. The next step, we have to config nginx. Go to sites-available folder at /usr/local/etc/nginx/sites-available and create a new file wordpress-sample.local
    // wordpress-sample.local
server {
    listen 80;

    root /Users/apple/www/wordpress-sample;
    index index.php index.html index.htm index.nginx-debian.html;

    server_name wordpress-sample.local;

    client_max_body_size 100M;

    location / {
        try_files $uri $uri/ /index.php?$query_string;
    }

    location ~ \.php$ {
        include        fastcgi.conf;
        fastcgi_pass   127.0.0.1:9000;
        fastcgi_index  index.php;
        include        fastcgi_params;
    }

    location ~ /\.ht {
        deny all;
    }
}
/Users/apple/www/wordpress-sample is where contains the wordpress source code that you’ve downloaded from the previous step. Run the command to link the config from sites-available to sites-enabled folder sudo ln -s /usr/local/etc/nginx/sites-available/wordpress-sample.local /usr/local/etc/nginx/sites-enabled/wordpress-sample.local. Restart nginx service on macos by sudo brew services restart nginx
Open your local domain http://wordpress-sample.local/ on a web browser
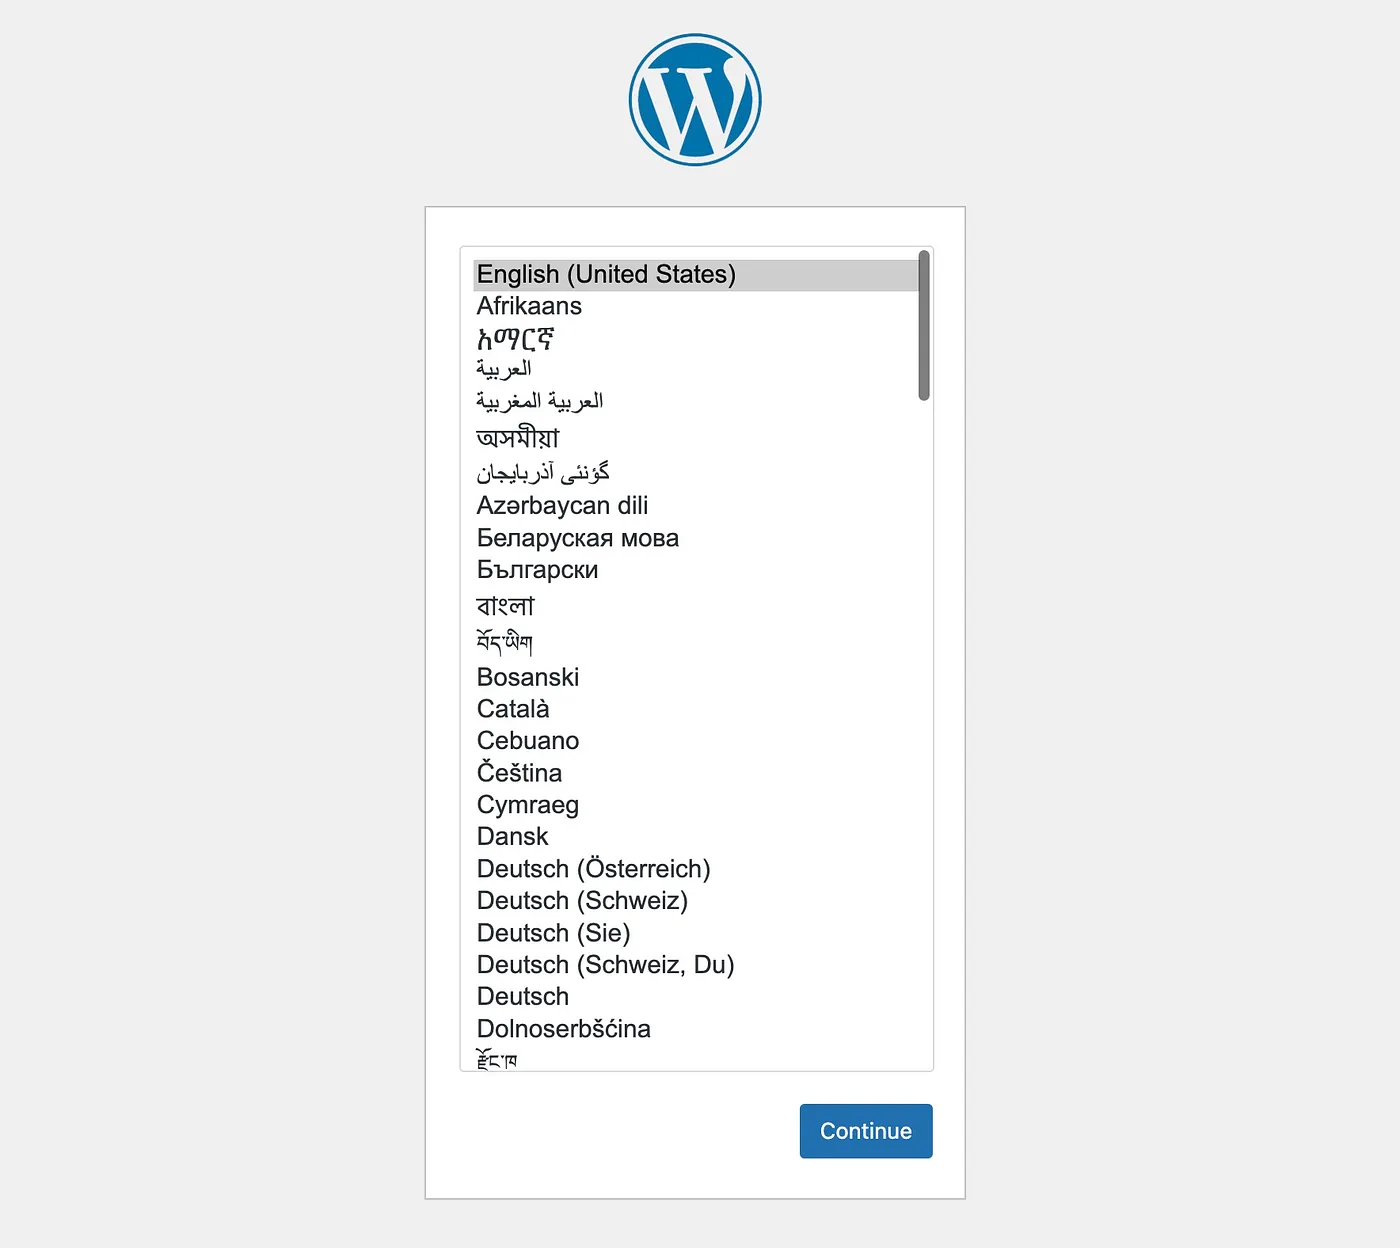
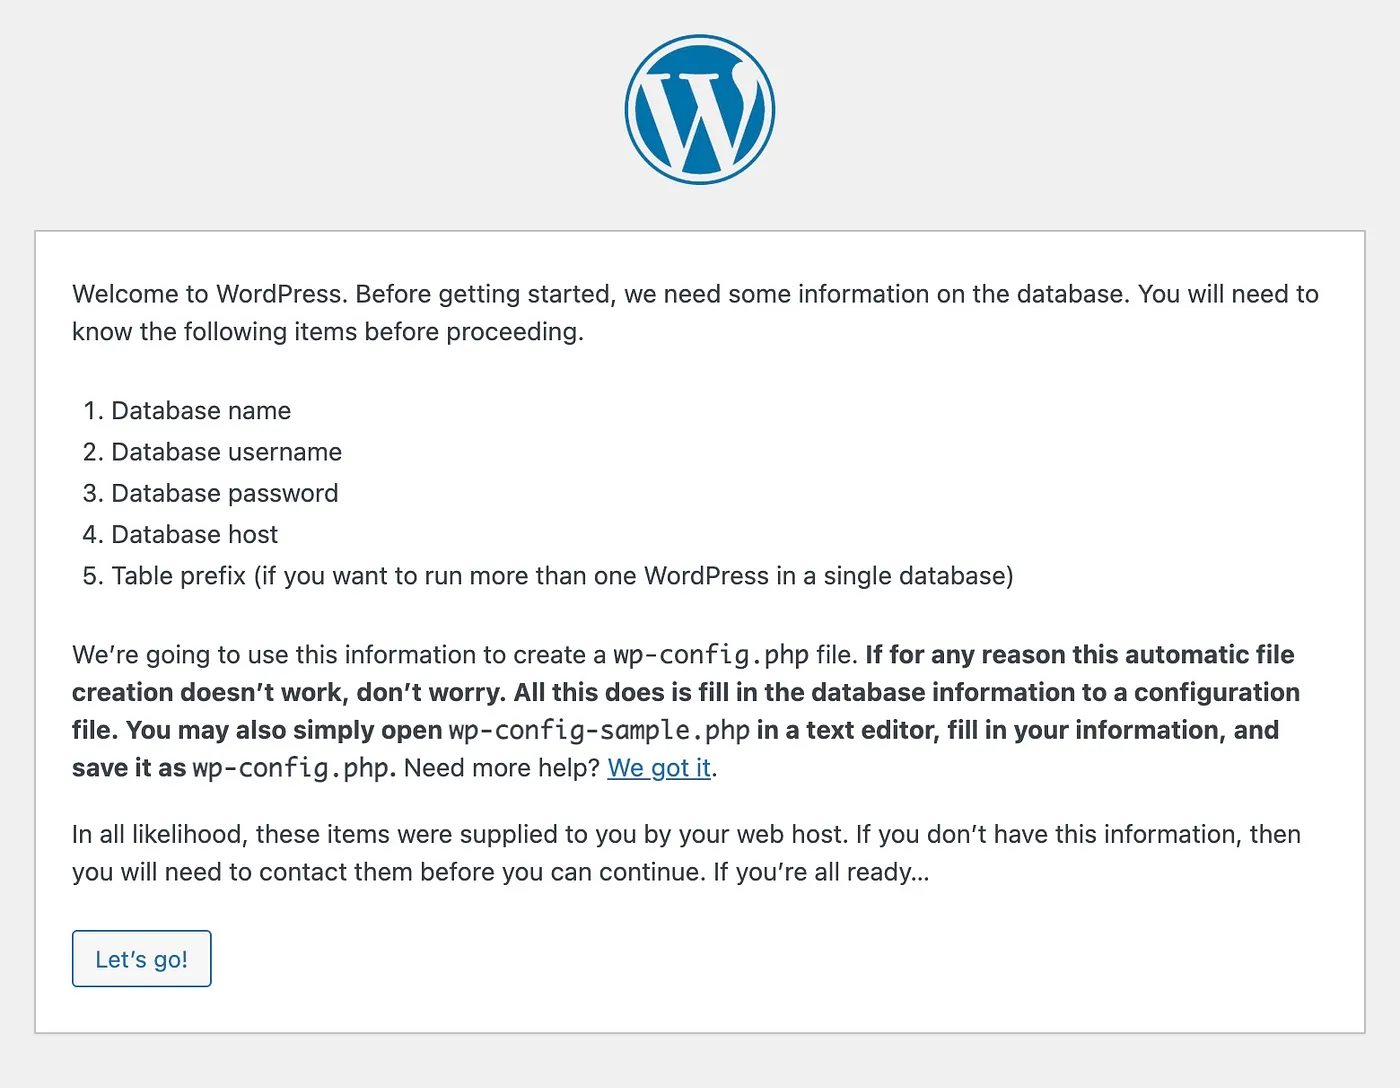
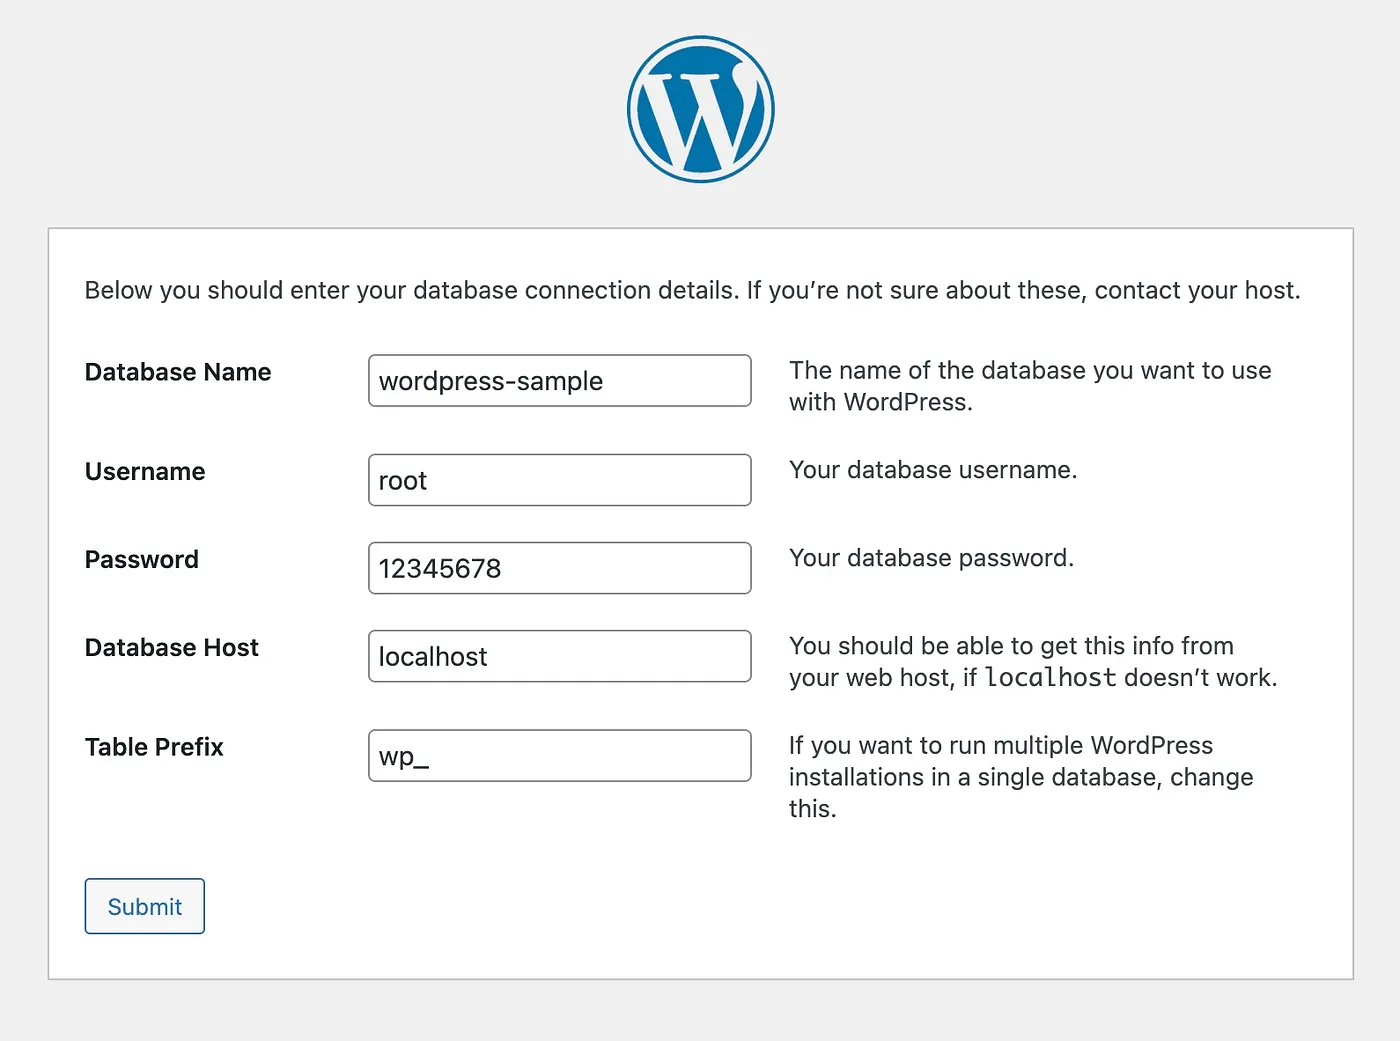
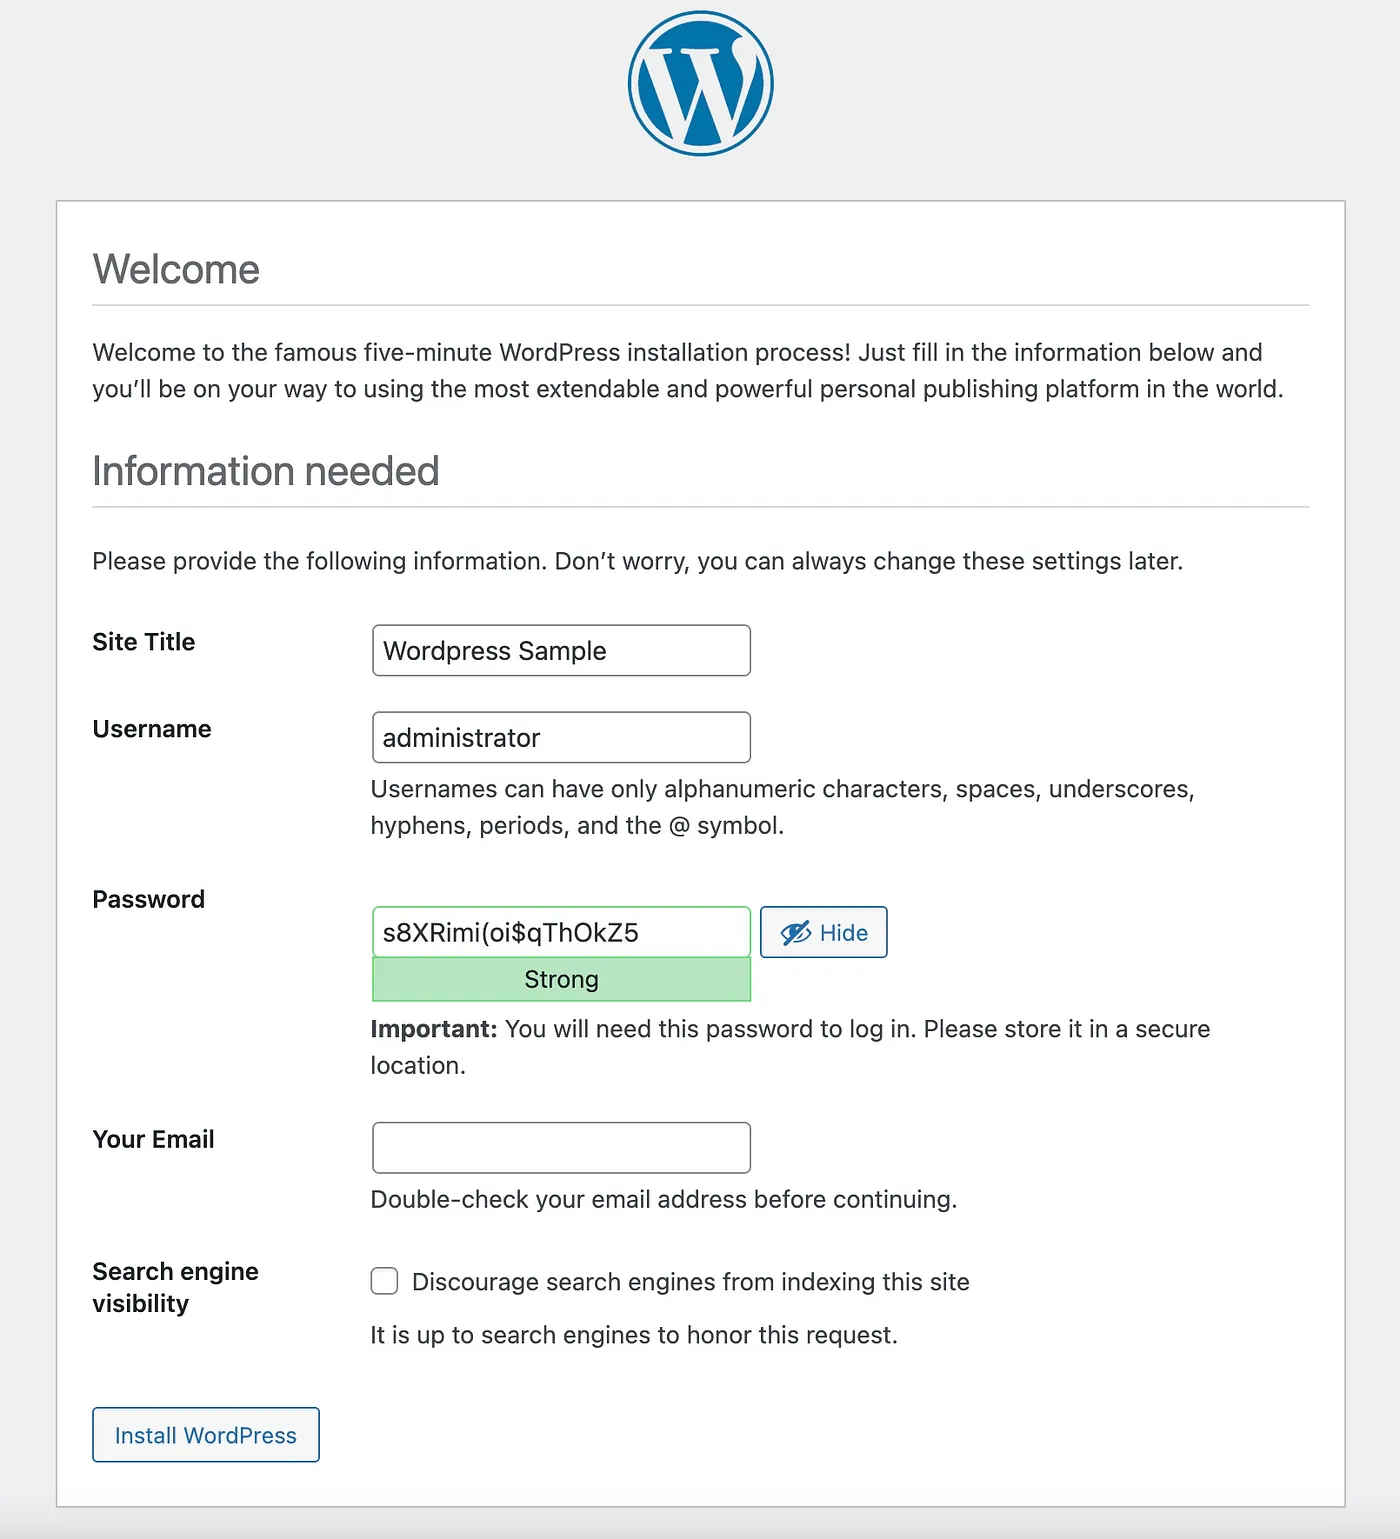
For now, we’ve installed the wordpress site successfully. Next step, we migrate some variables from wp-config.php to a custom file config.php (optional step).
    // config.php
<?php

define('DB_NAME', 'wordpress-sample');
define('DB_USER', 'root');
define('DB_PASSWORD', '12345678');
define('DB_HOST', 'localhost');
define('WP_DEBUG', true);
Comment or remove those variables & add this line on top of wp-config.php file include(dirname(__FILE__) . ‘/config.php’);
2. Create custom theme
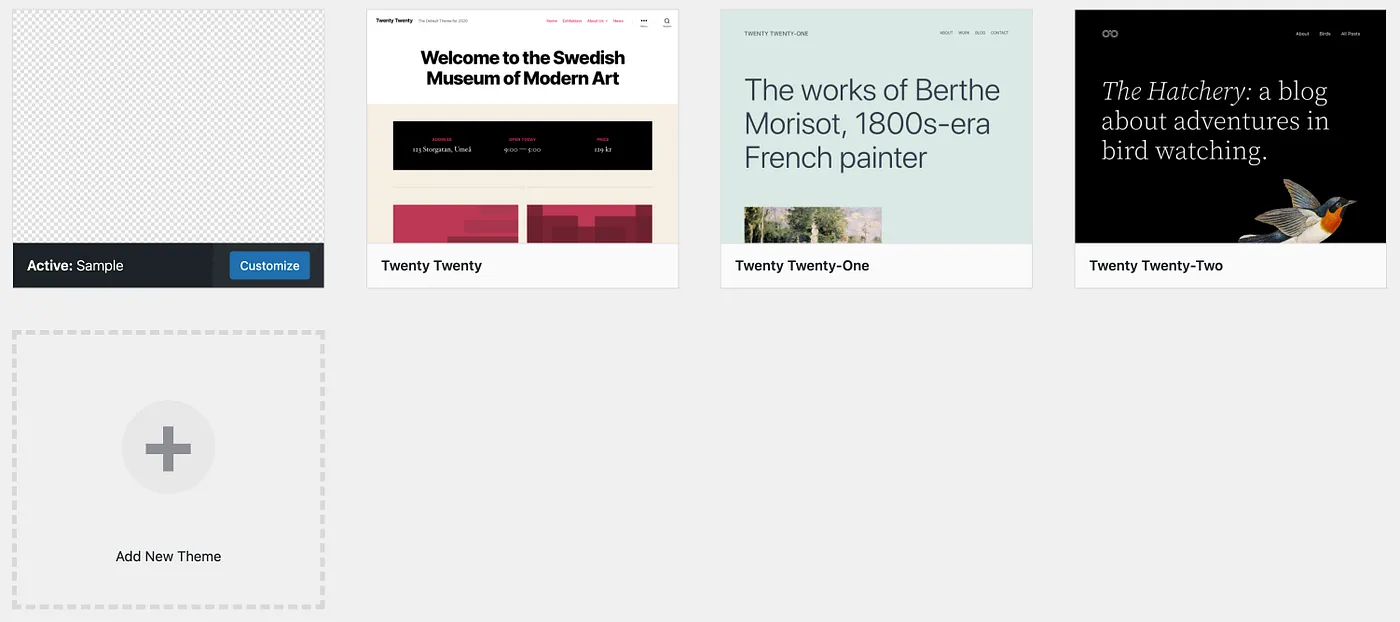
Go to the wp-content/themes folder, you can see that wordpress has provided 3 default themes. You have to create a new sample folder that contains your custom theme logic. Inside that new folder, create some necessary files & folder:
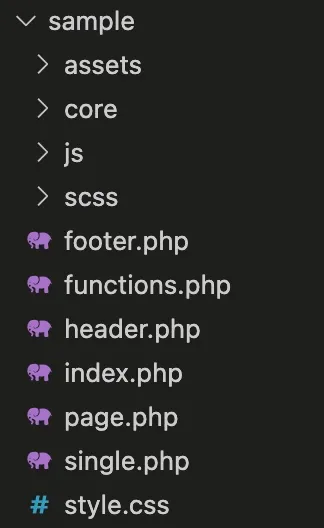
Read more about the meaning of other files at https://developer.wordpress.org/themes/basics/template-files/
    // style.css
/*
Theme Name: Sample
Theme URI:
Author: Olive Software
Author URI: https://www.olive-team.dev/
Description: Sample
Version: 1.0.0
License: GNU General Public License v2 or later
License URI:
Text Domain: sample
Tags: custom-background
*/
Add that content to the style.css file in order that wordpress can recognize your theme. After that, go to the Dashboard > Appearance, you will be able to see your theme has appeared, click to Active for using this theme.
Next step, add the logic for header.php & footer.php, include them to index.php file
    // index.php
<?php
get_header();
get_footer();
    // header.php
<!doctype html>
<html <?php language_attributes(); ?>>
<head>
    <meta charset="<?php bloginfo('charset'); ?>" />
    <meta name="viewport" content="width=device-width, initial-scale=1, shrink-to-fit=no">
    <link rel="profile" href="https://gmpg.org/xfn/11">
    <link rel="icon" href="<?php echo TEMPLATE_URI . '/assets/images/logo.png'; ?>" type="image/x-icon" />
    <link rel="shortcut icon" href="<?php echo TEMPLATE_URI . '/assets/images/logo.png'; ?>" type="image/x-icon" />
    <?php wp_head(); ?>
</head>

<body <?php body_class(); ?>>
    <header>

    </header>
    <footer>

</footer>

<?php wp_footer(); ?>

</body>
</html>
In the functions.php file, we must define the general variables that will be used in the logic. We have been using two wordpress hooks:
- init handle the logic when initializing theme
- wp_enqueue_scripts includes js & style files
require_once(CORE . ‘/init.php’); means that we will create general functions in the core/init.php file that will be called from anywhere in the custom theme.
    // functions.php
<?php

define('THEME_URL', get_stylesheet_directory());
define('CORE', THEME_URL . '/core');
define('TEMPLATE_URI', get_template_directory_uri());
define('HOME_URL', get_home_url());

require_once(CORE . '/init.php');

if (!function_exists('sample_setup')) {
    function sample_setup() {
        $languageFolder = THEME_URL . '/languages';
        load_theme_textdomain('sample', $languageFolder);

        add_theme_support('automatic-feed-links');
        add_theme_support('title-tag');
        add_theme_support('post-thumbnails');

        // Background
        $defaultBg = array(
            'default-color' => 'ffffff',
        );
        add_theme_support('custom-background', $defaultBg);
    }

    add_action('init', 'sample_setup');
}

if (!function_exists('sample_scripts')) {
    function sample_scripts() {

    }

    add_action('wp_enqueue_scripts', 'sample_scripts');
}
    // init.php
<?php

function debugging($data) {
    echo "<pre>";
    print_r($data);
    die;
}
2. Layout for a post
Create a new file template-parts/post-content.php that contains the template of a post. Update the single.php file with the code
    // single.php
<?php get_header(); ?>

<?php
    if (have_posts()) {
        while (have_posts()) {
            the_post();
            get_template_part('template-parts/post-content', get_post_type());
        }
    }
?>

<?php get_footer(); ?>
    // post-content.php
<main class="post-content">

</main>
3. Layout for a page
Create a new file template-parts/page-content.php that contains the template of a post. Update the page.php file with the code
    // page.php
<?php

get_header();

get_template_part('template-parts/page-content');

get_footer();
    // page-content.php
<main class="page-content">

</main>
4. Config Webpack
Normally, we can add js code or styles in the template file directly or import js & css files into wp_enqueue_scripts hook of wordpress. But in this blog, I’m going to show you another way to develop js code & styles of the custom theme.
The idea is that we will develope js code by ES6 syntax & styles by SCSS (like modern JS frameworks), after that using Webpack to compile & minify source code to normal js & css files. The advantage of this way is that the coding will be clean, and the output files will be smaller because they are minified and the page performance will be improved.
In the template folder wp-content/themes/sample, create the package.json & webpack.config.js files
    // package.json
{
    "name": "wordpress-sample",
    "author": "Olive Software",
    "private": true,
    "dependencies": {
        "@babel/polyfill": "^7.11.5"
    },
    "devDependencies": {
        "@babel/cli": "^7.11.6",
        "@babel/core": "^7.11.6",
        "@babel/preset-env": "^7.11.5",
        "autoprefixer": "^10.0.0",
        "babel-core": "^7.0.0-bridge.0",
        "browser-sync": "^2.26.12",
        "browser-sync-webpack-plugin": "^2.2.2",
        "css-loader": "^4.3.0",
        "css-minimizer-webpack-plugin": "^3.3.1",
        "file-loader": "^6.1.0",
        "mini-css-extract-plugin": "^0.11.2",
        "node-sass": "^4.14.1",
        "optimize-css-assets-webpack-plugin": "^6.0.1",
        "sass-loader": "^10.0.2",
        "uglifyjs-webpack-plugin": "^2.2.0",
        "url-loader": "^4.1.0",
        "webpack": "^4.44.1",
        "webpack-cli": "^3.3.12"
    },
    "scripts": {
        "prod": "webpack --mode production",
        "dev": "webpack --mode development --watch"
    },
    "babel": {
        "presets": [
            "@babel/preset-env"
        ]
    }
}
    // webpack.config.js
const MiniCssExtractPlugin = require('mini-css-extract-plugin');
const BrowserSyncPlugin = require('browser-sync-webpack-plugin');
const UglifyJsPlugin = require('uglifyjs-webpack-plugin');
const OptimizeCSSAssetsPlugin = require('optimize-css-assets-webpack-plugin');
var path = require('path');

const jsPath = './js';
const cssPath = './scss';
const outputPath = 'dist';
const localDomain = 'http://wordpress-sample.local';
const entryPoints = {
    'app': jsPath + '/app.js',
    'style': cssPath + '/style.scss',
};

module.exports = {
    entry: entryPoints,
    output: {
        path: path.resolve(__dirname, outputPath),
        filename: '[name].js',
    },
    plugins: [
        new MiniCssExtractPlugin({
            filename: '[name].css',
        }),
        new BrowserSyncPlugin({
            proxy: localDomain,
            files: [outputPath + '/*.css'],
            injectCss: true,
        }, { reload: false, }),
    ],
    module: {
        rules: [
            {
                test: /\.(sa|sc)ss$/,
                use: [
                    MiniCssExtractPlugin.loader,
                    'css-loader',
                    'sass-loader'
                ]
            },
            {
                test: /\.(jpg|jpeg|png|gif|woff|woff2|eot|ttf|svg)$/i,
                use: 'url-loader'
            }
        ]
    },
    optimization: {
        minimize: true,
        minimizer: [
            new UglifyJsPlugin({
                uglifyOptions: {
                    output: {
                        comments: false,
                    },
                },
            }),
            new OptimizeCSSAssetsPlugin({
                cssProcessorPluginOptions: {
                    preset: ['default', { discardComments: { removeAll: true } }],
                }
            })
        ],
    }
};
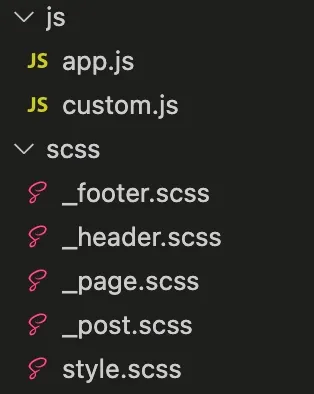
Based on the webpack.config.js file, Webpack will compile two files:
- wp-content/themes/sample/js/app.js to wp-content/themes/sample/dist/app.js
- wp-content/themes/sample/scss/style.scss to wp-content/themes/sample/dist/style.css
dist is the output folder. All js code must be imported to app.js & all scss code must be imported to style.scss. Don’t forget to create .gitignore file to ignore node_modules folder.
    // app.js
import './custom';
    // custom.js
console.log('Wordpress sample theme');
    // style.scss
@import './header';
@import './footer';
@import './page';
@import './post';
Run yarn install to install packages, after that run yarn dev to see the output files. For now, a new dist folder has been created that contains app.js & style.css files. Webpack has been setup successfully. Next step, come back functions.php file and include compiled files to wp_enqueue_scripts hook. By the yarn dev command, webpack will detect any changes in the js & scss folders and recompile the bundle files real time.
    // functions.php
...
function sample_scripts() {
    ...
    wp_enqueue_style('sample-style', TEMPLATE_URI . '/dist/style.css', array(), false);
    wp_enqueue_script('sample-script', TEMPLATE_URI . '/dist/app.js', array(), false, true);
    ...
}
...
For now, the bundle files are ready for using. Try to create a new post & add some scss code to see the changes on the UI.
    // _header.scss
header {
    background: #e8e8e8;
    height: 4rem;
    width: 100%;
}
    // _footer.scss
footer {
    background: #4a4a4a;
    width: 100%;
    height: 8rem;
}
    // _post.scss
.post-content {
    height: calc(100vh - 10rem);
}
Try to reload the post sample to see the result. The bundle files have been working normally.

